Fail to plan, Plan to fail.
Ok, this title is one heavy cliché, I know, but that said, clichés are clichés because they’re clichés!
‘Fail to plan, Plan to fail.’ This statement is so true, mind you, in life too, not just in fly tying.
So many tyers attack a fly with no real game plan. They just tie and therein lies the rub, as Shakespeare would’ve chirped if he was writing this thing.
A bit of forethought goes a long way.
Tying a pattern with no idea of what the natural looks like or behaves like is like playing golf in the dark; a really bad idea!
The hook you use needs to be dictated by the natural you intend to imitate and the function you need the fly to perform, Flies tied on light wire hooks tend to float better than flies tied with uber-heavy wire hooks for example, so if your mission was a delicate dry then the light wire option would be better. It all makes logical sense. Form follows function, but, you can only sort out the form part if you understand why things function the way they do.
We’ll be using the damselfly nymph as a case study so to speak.
Damsel fly nymphs have long thin abdomens, and unlike their beefed cousins the Dragonfly nymphs they can’t fart spouts of water out of their bums.

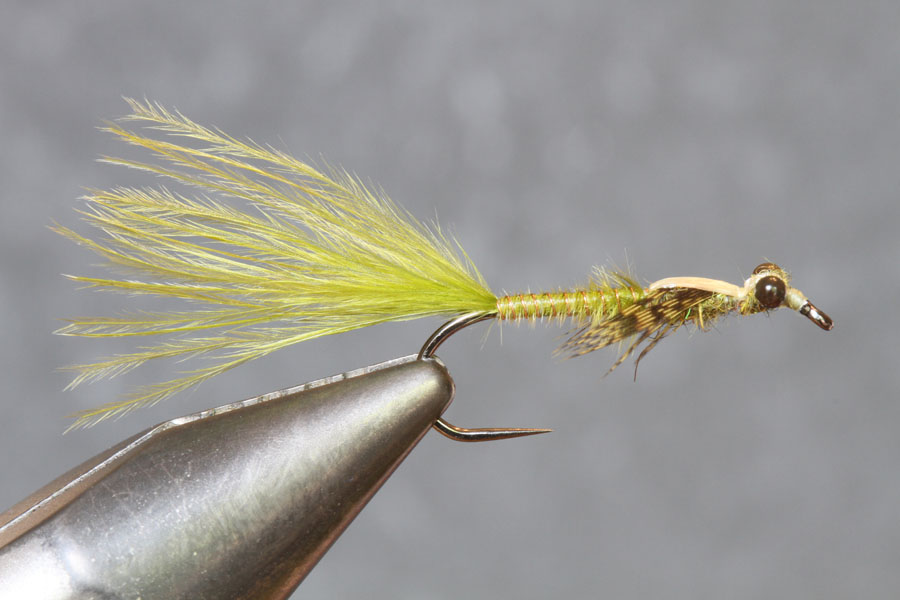
Notice the long, thin abdomens of these damsel nymphs (Photo per Tom Sutcliffe)
They’re not that cool. They move by wriggling those abdomens of theirs from side to side, that’s why damselfly nymphs swim with their legs outstretched. Those outstretched legs stabilise them. They have a prominent thorax with 6 legs, (trout can’t count so don’t stress about how many legs you give your fly). Keep things sparse though, damsels are delicate so try and emulate this quality in your fly.
They also have prominent beady, alien-like eyes and flat heads.
Ok, so that’s basically a few facts about them. How do we tie a perfect imitation?
Well, perfectly imitating that side to side wriggle thing they do is almost impossible so I don’t bother; instead I go for an imitation with general movement and the correct profile. Movement I get through a nice thin marabou tail, it’s adequate, the main thing is that your fly needs to appear to be a living organism and marabou does that for you.
I try to incorporate the main features and triggers of the natural. Proportionally this is an imitation which can have you flummoxed if you don’t plan things properly. I tend to tie mine on a nice long shank hook. This is not the only way to go about tying them but I like doing them like this.
For beginner tiers this fly does tend to provide a few challenges. Getting the balance and proportion right is a major thing. The biggest error tiers make is not visualising the finished fly on the hook in their vice. YOU NEED TO SEE THE FLY ON THE HOOK BEFORE YOU’VE EVEN TIED IT!
A lot of guys battle with this visualising thing so what I did was come up with one mega cheat that guarantees perfectly proportioned and balanced flies every time.
The first thing I do is use a nice, thin, lightly-coloured thread. Griffiths Sheer 14/0 is great.
Rememeber Tip 1! Use the thinnest thread possible and keep it flat!
I wrap a thin layer of lightly coloured fly tying thread on the hook shank (This offers a nice base on which to seat materials, flies tied with this base tend to be more durable than flies tied without it!) and then, using a fine liner, I mark out plot points on the hook shank. So , I’ll make a mark where the body needs to end, where the thorax needs to start and end, and where the head needs to start and end.

I’ll then tie within these Parameters I’ve set and in so doing tie a perfectly proportioned fly every time.

Call this ‘training wheels’ for fly tyers if you like. Look, I don’t do this myself, I have over the years developed an eye for visualisation, but if you can’t visualise, then this method does work.
This idea can be utilised for almost any fly. It’s also a great way to tie clean heads on your flies. Beginners tend to crowd or choke the hook eye when they tie. To help them when I teach, I get them to make a mark 2-3 mm behind the eye of the hook. The distance between the mark and the hook eye I call no man’s land. The idea is that no material may pass no man’s land while you’re tying the fly, the exception being the last part of the tying sequence. Do this and you’ll tie neat heads that ensure easy threading of tippets every time.
Also some guys don’t like the idea of a lighter-coloured thread, but there are numerous advantages. Firstly , like we’ve discussed, one can mark out the proportions, but lighter white coloured threads allow the materials used in the fly to retain their colour when wet. Dark threads don’t do this. If having a little white thread at the head is a problem then just make one dab with a copic marker of your colour choice and Bobs your uncle. (Copic markers van be bought individually at PNA)
Gee wiz, that’s long! Hope you guys are still awake.
See my fly tying tips Part 1 at: http://www.tomsutcliffe.co.za/fly-fishing/fly-tying/item/1006-gordon-van-der-spuys-fly-tying-tips-part-1.html
Till next week.
G.


