As a young tier in high school I’d spend many hours burning mono eyes for damsel and dragon imitations. I found melting my own eyes gave me a more realistic looking eye. The shape was simply better, not totally round but slightly flatter and more tear-shaped. Do trout care? Probably not, but I am more confident with mono eyes on my Damsels and Dragons so I guess I’ll be sticking to them.
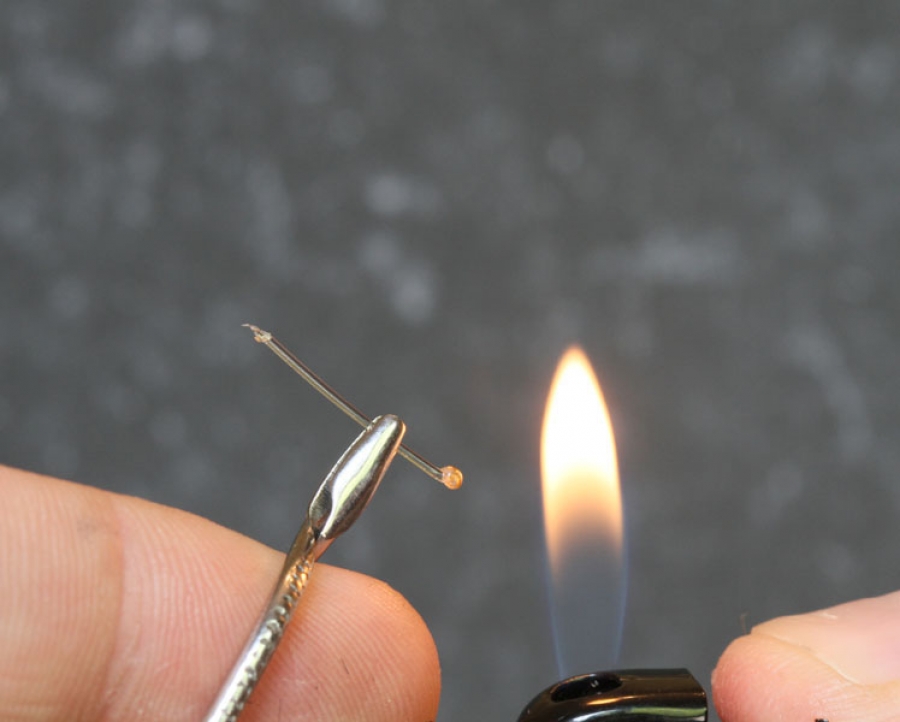
I find using a nice thick maxima ultra green mono to be ideal. For damsels I use the 35lb, for dragons I go twice that size. I only use a very short piece. Holding it in the middle with a hackle pliers (old school English hackle pliers work well) I tilt it at a 45 degree angle and gently start to melt the mono on the side sloping downwards.
Click in images to enlarge them

I don’t use constant heat, the idea is to melt the mono without heating up the hackle pliers too much. Take your time and only start melting the other eye once the first one is dry.
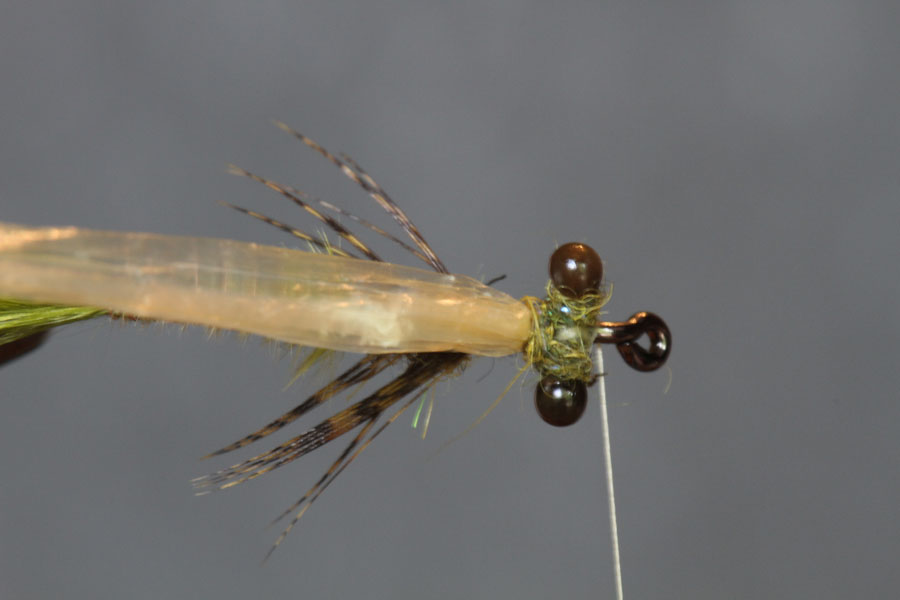
Now tie the eyes in using a few figure of 8 wraps. Start off by giving 2 – 3 good wraps just to get the eyes on the hook shank. After that you can tweak them into position and secure them there with the figure of 8 wraps. Make sure you tie the mono in slap bang in the middle. Adding a drop of super glue to the thread wraps keeping the eyes in position would not be a bad idea at this stage.

Most people would now dub around the eyes using a few figure of 8 wraps, but this I don’t like. You end up with a round fat head. Herman Botes from Pappa Roach fame taught me a very cool trick regarding dubbing Damsel and dragon eyes. Dub around individual eyes.

This way you get a flatter head, very much keeping in line with the profile of the naturals. Once I’ve done this I bring my remaining Swiss straw over and tie it in. I always use a half hitch to secure it in place before I trim off the excess.

If you don’t do this your Swiss straw can sometimes slip out under the thread wraps. I now whip finish the fly. I don’t form a thread head, I just simply whip finish covering the tiny remaining piece of protruding Swiss straw as I go. This way you get a small head. On the picture of the finished fly you’ll notice that my thread head is perhaps a tad too long. I could’ve left less space for it. In other words, my no man’s land could’ve been smaller.

Well, that basically brings us to the end of this first series of chirps. My idea here was to get you comfortable with the mechanics of the tying as opposed to just tying a damselfly nymph. I chose this patterns because it has a lot of techniques which are very relevant in terms of laying the foundations for a decent skills set when it comes to tying. Look at what I’ve said carefully and see the sense behind it. Once you’re understanding what it is you’re doing, the doing becomes that much easier.
Until next time!
Fly for now
G


