To most South African fly fishers, Capetonian Korrie Broos is Czech nymphing specialist and the person who significantly promoted local expertise and understanding by bringing to this country anglers like Edoardo Ferrero, Jiri Klima and Pascal Cognard.
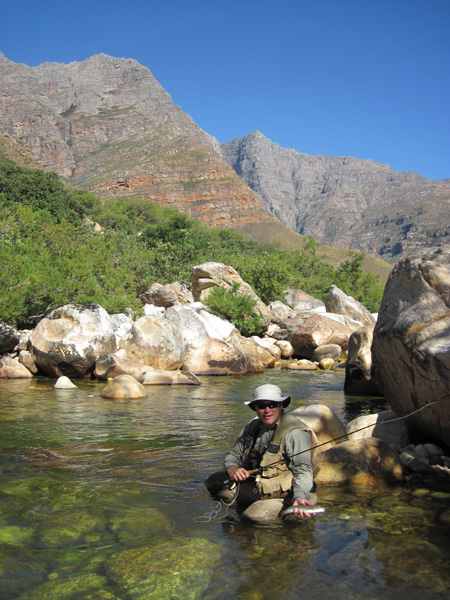
Korrie Broos on the Molenaars River, Western Cape
Click to enlarge images
Now, in my assessment, he has created a CDC dry fly which seems to confer significant advantages.
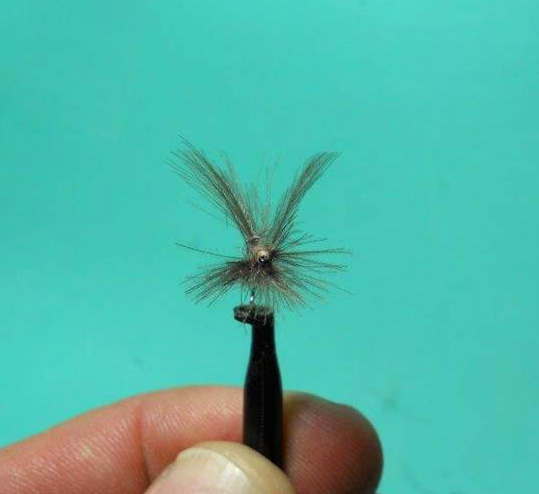
He calls it the X Factor and it was inspired by the posture of mayfly duns on the water. To me it has the uncluttered lines of the Swisher and Richards No-Hackle Dun but with the increased buoyancy and delicacy of presentation which the “miracle feather” – to quote Leon Links – confers.
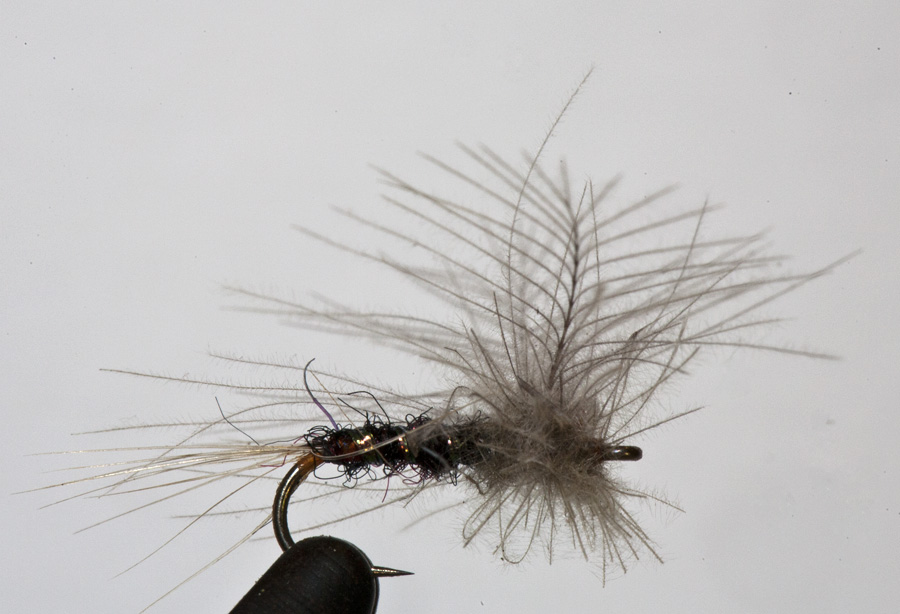
The X-Factor dry fly above and in a slant tank below
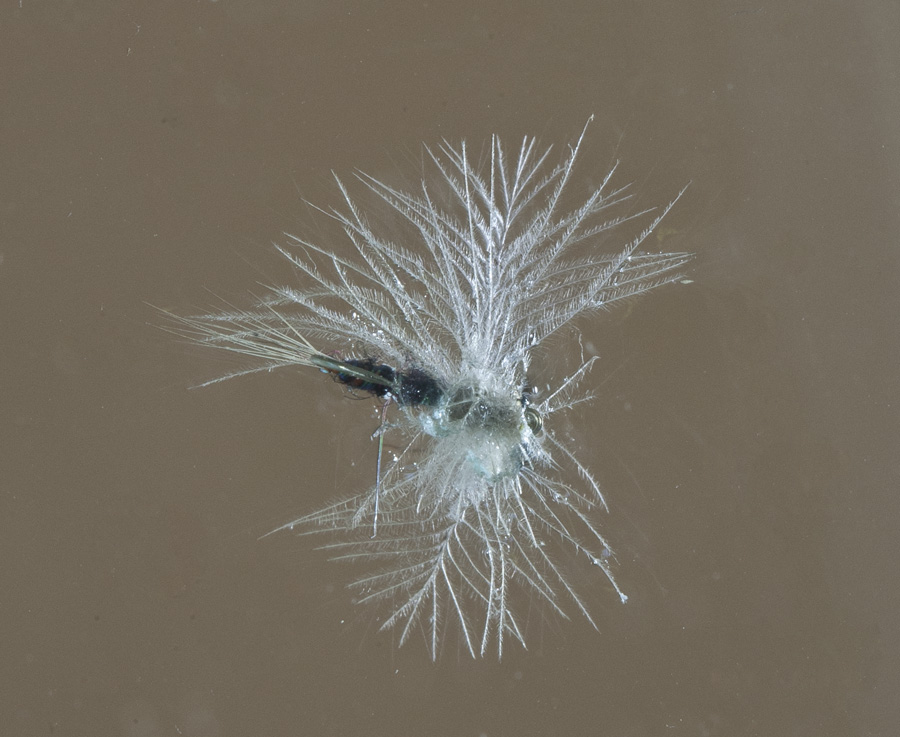
The late Richard Walker always averred that no fly should be featured in an article unless it had caught a hundred fish for its creator and Korrie says he is well on the way to that target. ‘This pattern has taken me to a tally of 50 fish much faster than any other dry fly I have ever used. It presents with exceptional delicacy, floats through the roughest water and sits on the water like the natural,’ he says.
Korrie says that at the beginning of the season when the Western Cape’s streams were still high, the X Factor deceived 15 trout in two and a half hours.
It is certainly not a fly that beginners will instantly master, but Korrie has supplied the following sequential photographs and his description of how he ties the fly.
Dressing
Hook Light wire #12 to 20
Thread Light cream to dark brown, depending on the body colour you choose
Tail Coq De Leon
Ribbing thin flash or tinsel
Body Dubbing of choice
Thorax Dubbed CDC barbules
Wings Two matching CDC feathers.
Method
Tie in the CDL tail barbs
Tie in the ribbing
Dub thread and tie to about three quarters of the hook shank.
Palmer the ribbing to the end of the body and tie off
Now the tricky part comes in. Follow the image sequence of the tying and then the detailed instruction text below the images.
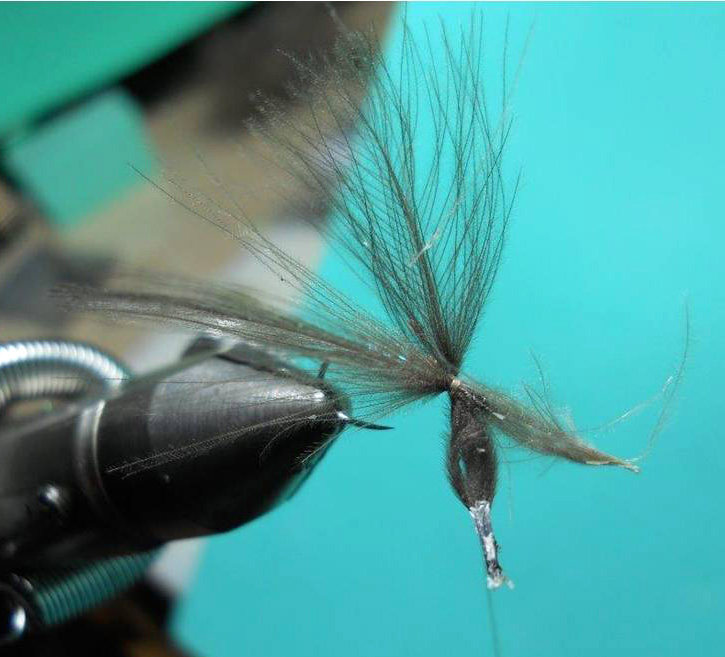
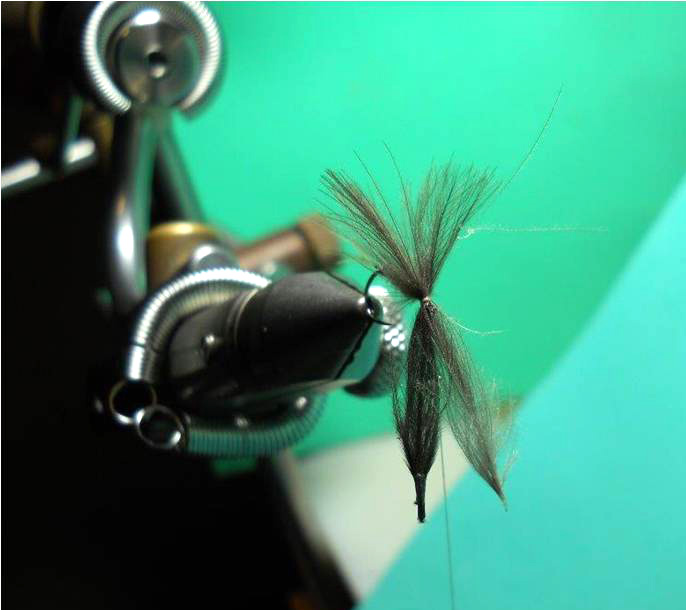
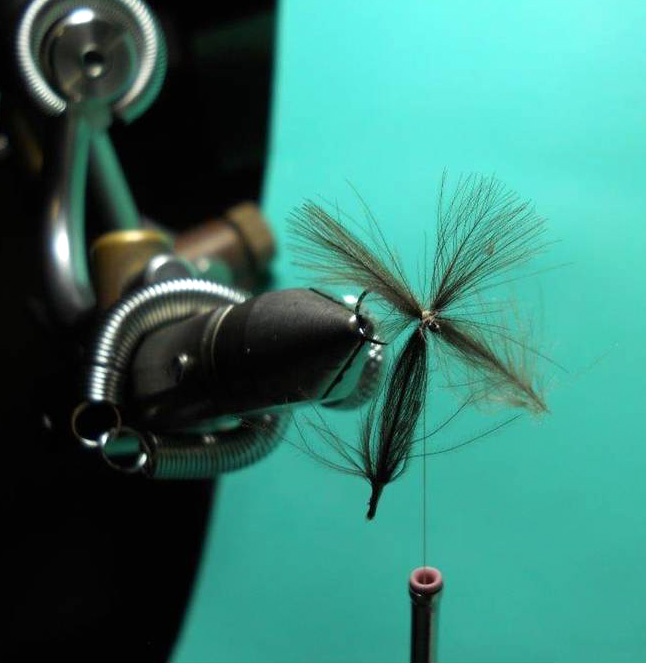
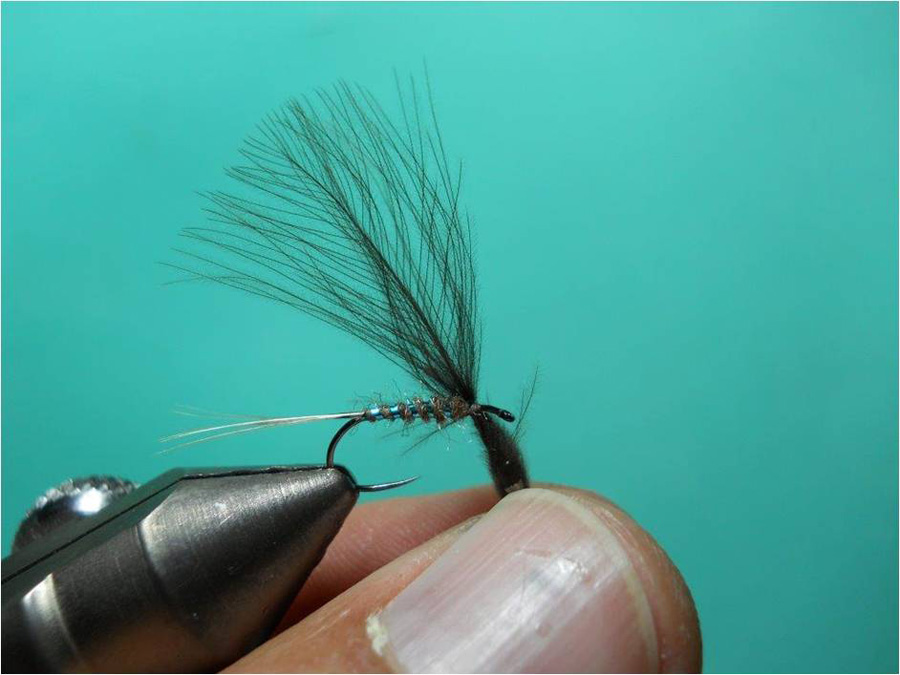
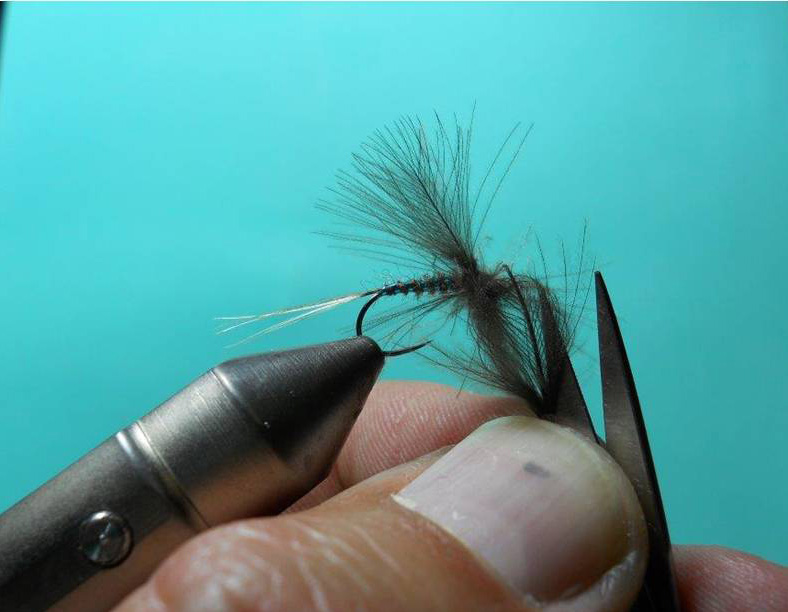
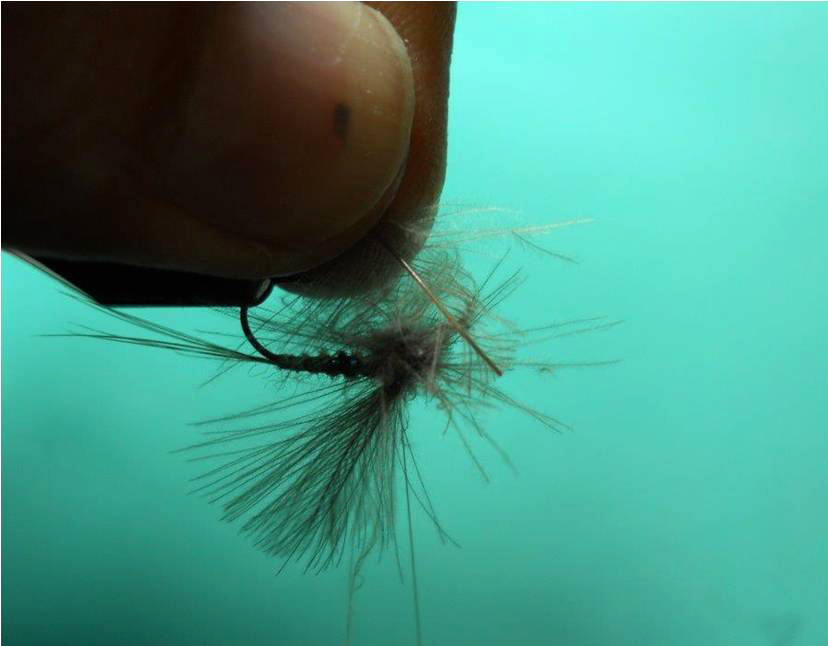
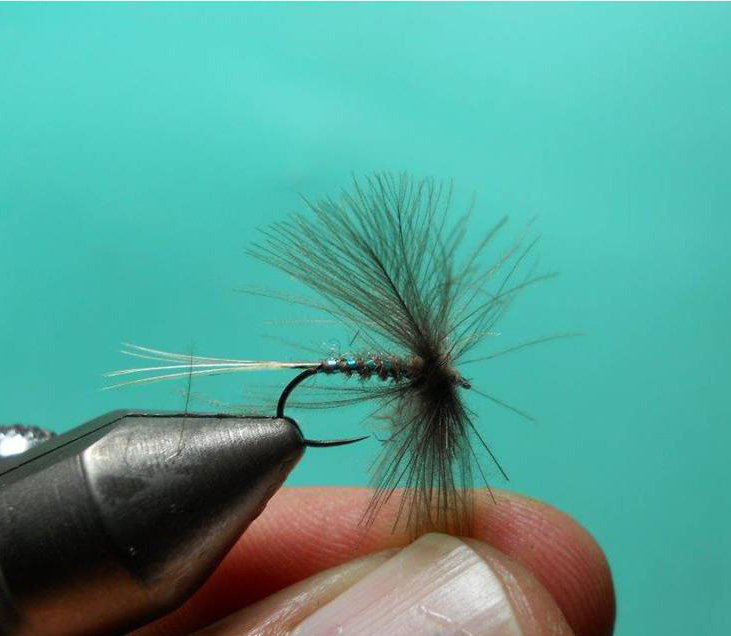
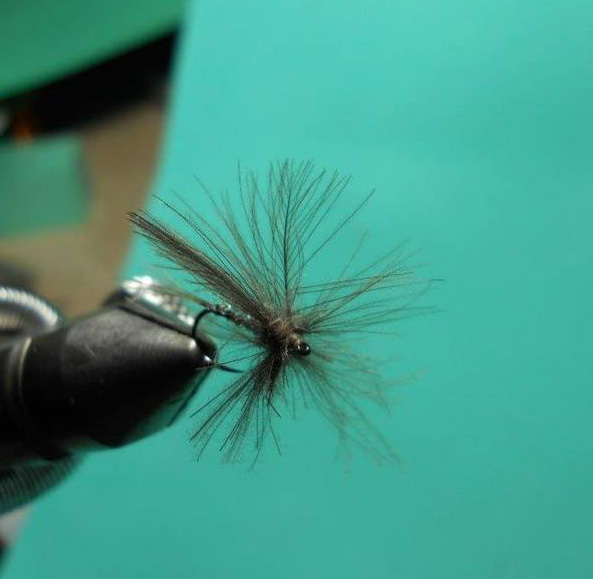
Tie one CDC feather with a 45 degree angle over the shank and also a 45 degree angle from above the shank to below the shank with just two firm thread wraps. These feathers which will comprise the wings of the mayfly imitation must be positioned above the hook shank so that they are about two and half times longer than the height of the wing that you will end up with. This extra length is needed because you are going to pull the wings into position trapping the fibres that, beneath the hook shank, will form the ‘feet’ of the mayfly. Tie the second CDC feather in the opposite direction, at 45 degrees across and 45 diagonal from the top to below the hook shank, also with only two firm wraps.
The reason for the firm wraps is to enable you to slide/pull the CDC feathers into position.
Looking from the front and top, the CDC feathers will be forming an X, with the tips above the hook shank and the quills below the hook shank.
It is important to keep the CDC feathers parallel to each other.
Now, gently pull the ONE feather, down, until the wing is in position, and the right length. Do the same with the second feather.
This is a bit tricky and it takes some practise to align the feathers so that they are in a parallel plane to one another.
Once in the right position, slightly tilted backwards, tie in with figure of eight wraps plus a couple around the back and front of the CDC feathers. Use the thread to get the feathers, parallel to each other.
Because the creation of the wings used a lot of thread wraps you will need to cover these wraps with CDC barbules stripped from a feather and twisted onto the thread as dubbing.
The next important step is creating the “feet” of the mayfly below the hook shank using the base of the feathers.
Take one of the CDC feathers sticking out, under the hook shank. I like to bend the feather so that the quill, stem sticks out nicely and trim away the stem only, making the cut as close to the hook shank as possible. As you pull the quill away you will leave behind the barbules trapped by the X wraps of thread
If you have a rotary vise, tilt it upside down and trim away the quill on the other side.
Pinch all the CDC barbules between thumb and forefinger and pull downwards. Trim with your scissors to a length approximately one and a half times the hook gape. These barbules will puff out like pom poms providing a stable platform beneath the wings upon which the front section of the fly rests. You can trim away the unruly barbules.
You can also trim the CDC below the hook shank into a V if you want a different foot print.
The lovely part for me is the "softness" with which the CDC sits on the water - not the typical stiff, barbs of the normal dry fly hackle.
A final word of caution, to get the CDC wings to sit ‘right’ takes a bit of practise and you might take a couple of flies to achieve that goal but the results are worth it.
Korrie says when fishing this fly he always takes a small packet of tissues and, after releasing a trout, washes the fly and squeezes it dry in a tissue.
Ed Herbst


