TYING THE ZAK


An all-purpose, medium-weighted Zak. Note the touch of black tying thread just under the tail. This tells me the fly is medium, not heavily weighted
Introduction
You want at least one mayfly nymph that is a dark-coloured all-purpose pattern, the sort of fly you can safely tie on and feel confident will come close to matching pretty well any of the Baetis mayfly nymphs. The pattern should be easy to tie and durable and you need (a) un-weighted, (b) emerger and (c) medium and (d) heavily weighted flies. (See end of article for the Emerger and Glass Bead Zaks).
Over the years I’ve changed this pattern a little as I discovered better materials, or better tying methods, or deficiencies in the original. The idea is to capture the crustaceous-looking abdominal segments of the natural, the long tails, a suggestion of breathing gills on the side of the abdomen, a prominent thorax and finally, a subtle suggestion of legs. (See below)
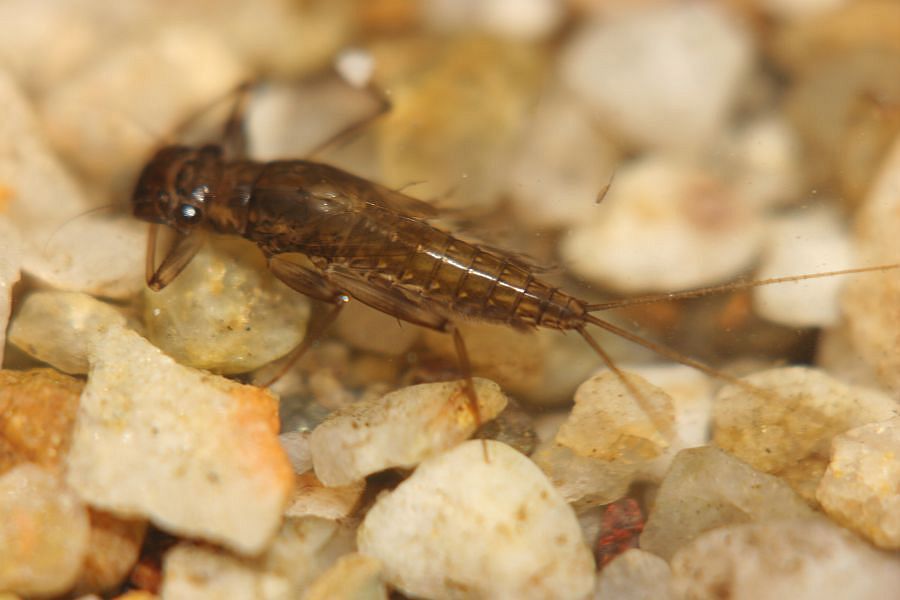
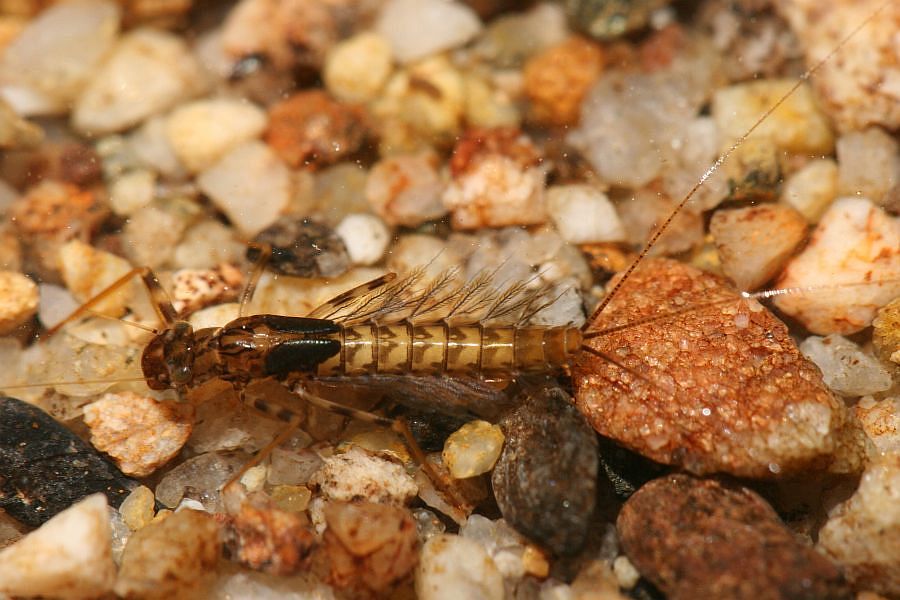
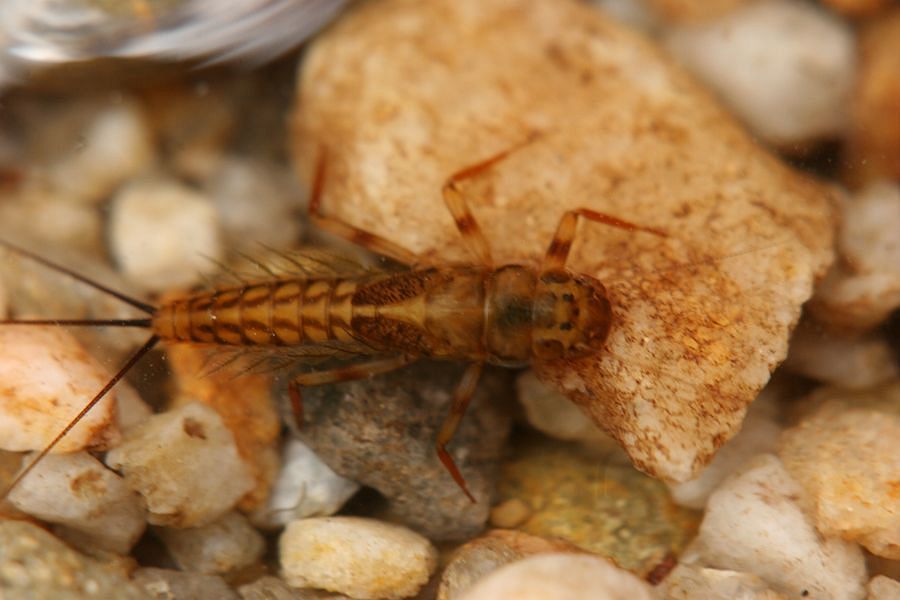
Each of the three different species of mayfly nymphs above nicely illustrate the triggers I looked to imitate in the Zak. Particularly note the crustaceous segmentation of the abdomen and dark thorax in the middle picture.
These are the key triggers to look for in most mayfly nymphs. But in general the fly must also have movement and the right colour and shape. This means long, wispy tail fibres, a cigar shaped body, prominent thorax with a hint of hackle to suggest legs and the colour should be dark to almost black. If these characteristics are not immediately evident in any Zak you tied, give it away – or if you didn’t tie it, don’t buy it. Particularly, discard any that are over-hackled or that have dense, stubby tails.
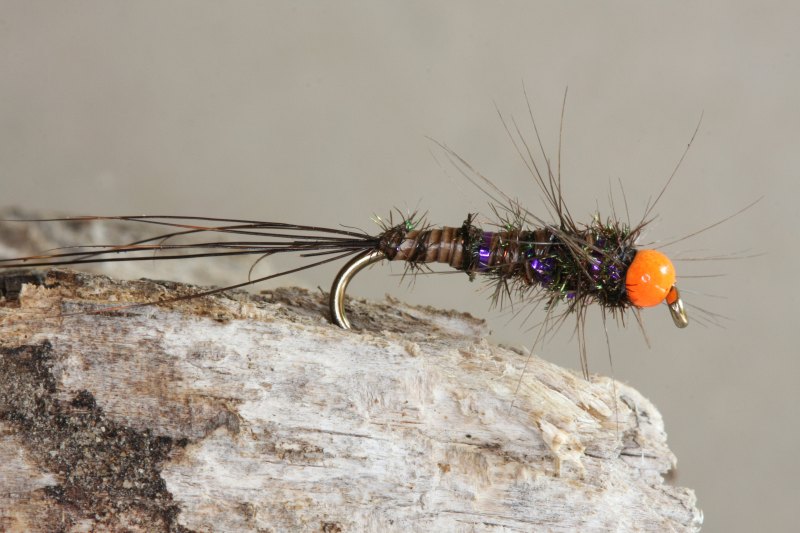
Note the triggers in this Zak, including just a hint of breathing gills
What you will need to tie this fly
You want a 1x long shank nymph hook, glass, brass, tungsten or hot orange bead (depending on preference and weighting requirements), water mongoose guard hairs (or squirrel tail fibers, or as Pete Brigg let me know, the guard hairs off a jackal skin), dun or black cock hackle, tying thread to match your weight coding for nymphs (I use red thread on heavily weighted nymphs, black on medium-weighted patterns), brass fuse wire (optional), lead wire (optional depending on weight needs), a single strand of plain wool to build up the under-thorax on un-weighted neutral density patterns, five peacock herls, three of them stripped clean of their flue (these should come from a herl near the eye of the tail feather to get maximal segmentation) and finally, a blue embroidery thread called DMC Fil Metalise (colour number 4012, a purple/blue), or blue Accent Yarn, both available from haberdashery stores.
Tying steps
Add a tungsten, brass or a glass bead to the hook if you prefer using beads. It’s optional on this pattern and the jury is still out on what works best. I sometimes use dark green, red or blue glass beads for un-weighted patterns and brass or tungsten beads for weighted ones, but there are no rules.
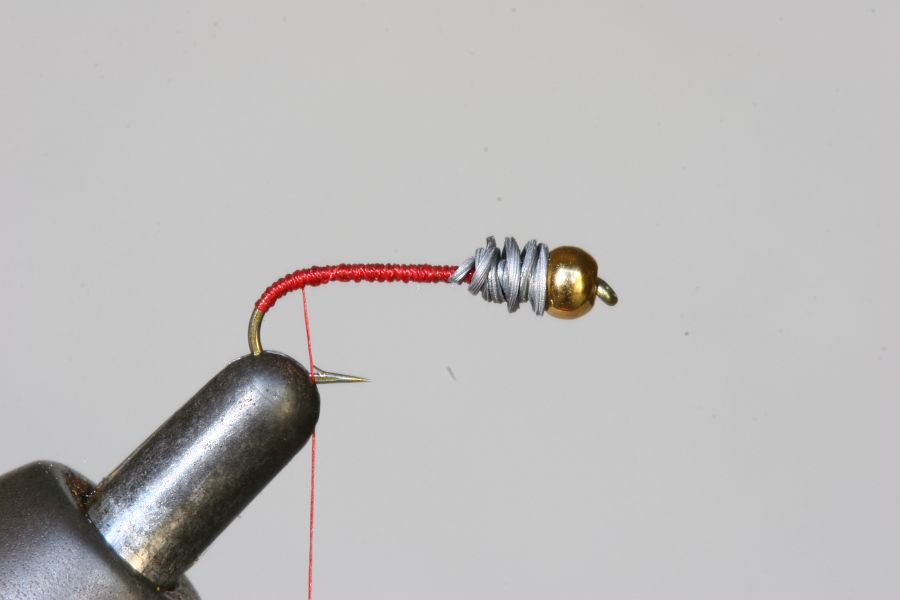
Dress the hook shank with tying thread. Add turns of lead wire at the thorax, or if you have not used a bead and do not want weight, build up the thorax with a single strand of natural wool.
Tie in a sparse tail of water mongoose guard hairs, or, if you don’t have water mongoose, a few wisps of dark dun or black cock hackle or squirrel tail fibres. You want about six to ten fibres only. The tail should be sparse and about one and a half to two times as long as the hook shank.

(Note the 'code': red thread showing under the tail means this is a heavily weighted fly)
The body formula is one piece of blue Fil Metalise (or Accent Yarn), fine copper or brass wire (optional), three peacock herls, two of them stripped clean of all flue. Do this by stroking the herl against the grain, using the thumb nail held against the pulp of your index finger. It’s only necessary to strip the bottom half of each herl. With a little practice it goes quickly.

Start tying in the body materials just behind the thorax one by one

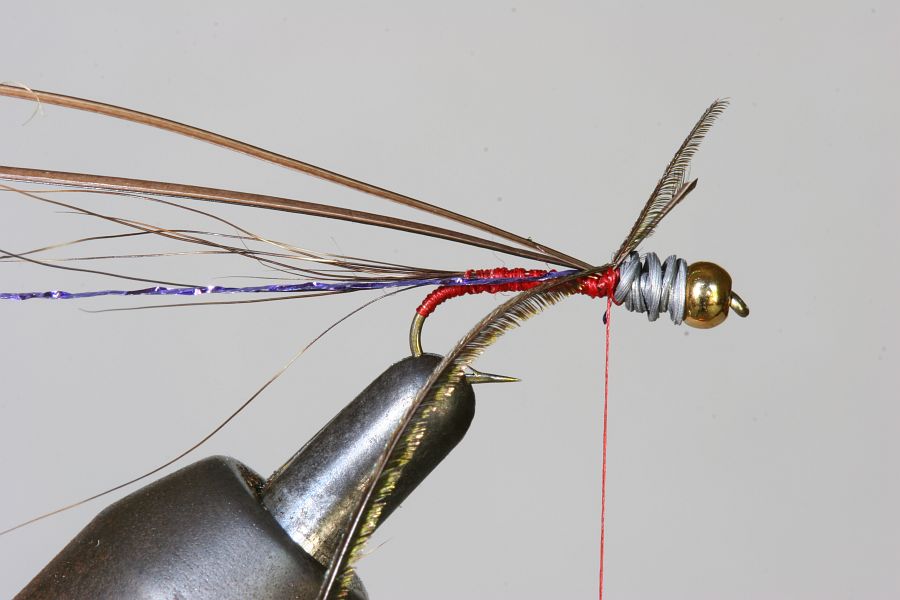
All the body materials in place just behind the thorax.
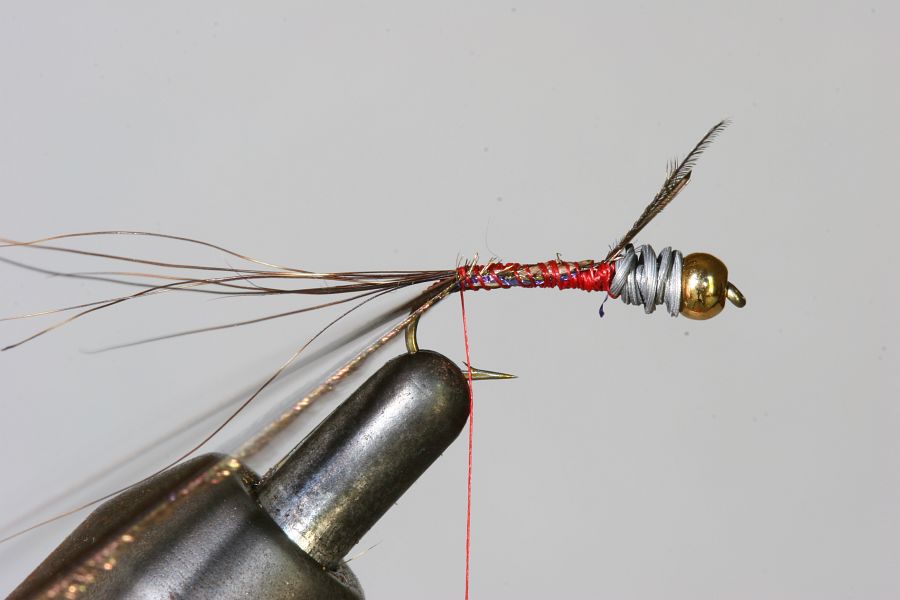
Gather the body material into one bunch, holding it under tension and pulling towards your chest. Then wind the silk back towards the tail, trapping the mixed materials on the side of the hook shank as you go. Doing this reduces the risk of an unsightly blob at the tail, adds strength and some lateral shape that makes the body more oval than round. This, in theory anyway, will help the fly to sink in a zigzag way like a falling leaf rather than just straight down. (I did say ‘in theory’!)

Body materials wrapped on the side of the shank, thread returned to just behind the thorax.
Gently twist the peacock herl, fuse wire and the DMC thread, but don’t make too tight a rope of them (See below). Two to three twists are all you need. Now wrap this rope fairly tightly towards the thorax.
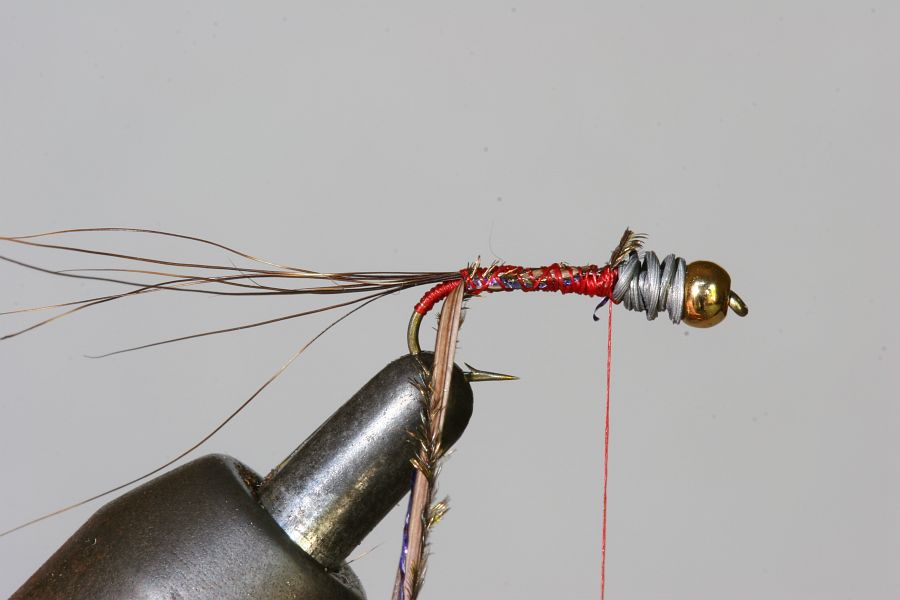
Gently twist the body rope, three or four turns only.
Stop at the thorax and secure the rope with a few wraps of thread as below.

Now tie in a long dark dun, or black cock hackle by the tip. Genetic hackle is perfect, because it is long and thin, but dark Indian or Chinese necks work well enough. The size of hackle you use should be the same as you would choose if you were dressing a dry fly on an equivalent sized hook. To avoid that terrible over-dressed or over-hackled look, strip the fibres off one side of the hackle before you tie it in. Remember the insect we are imitating only has six legs so we don't want to end up with a fly that looks like a toilet brush! This is a common fault in commercial patterns.

Notice the pretty segmentation in the peacock herl fibers and 'breathing gills' above
Add one extra peacock herl to give more darkness and definition to the thorax and again twist these lightly together (See below). The hackle flares in all directions, marvelous for creating bugginess, movement and exploiting a great trigger, the legs!
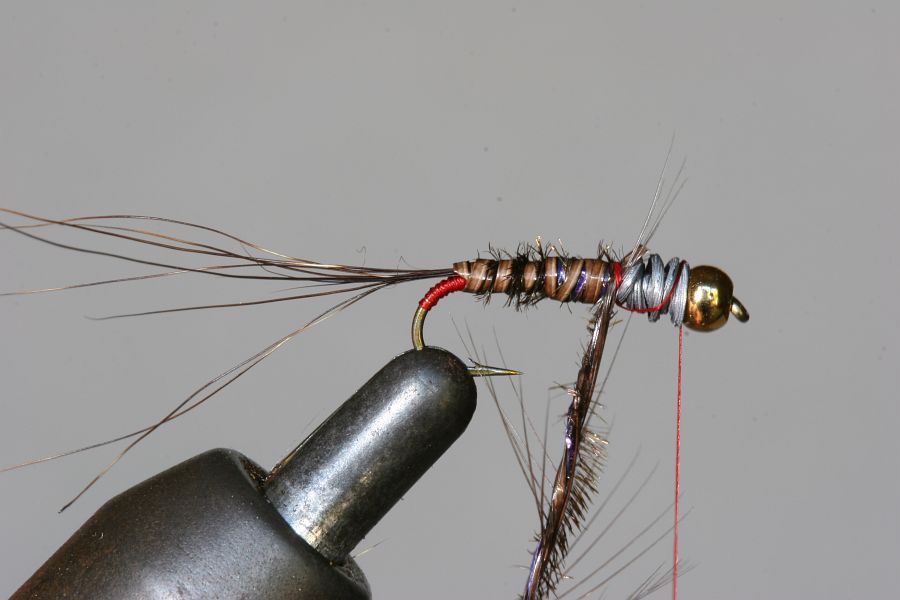
See how the hackle flares when you twist the rope!
Now wind the body rope/hackle combination until it is tight behind the eye.Keep tension and tie off at this point, pulling the knot well down to seat it firmly behind the bead. Add two more half hitches for safety.

A size 16 Zak, heavily weighted,buggy-looking and full of triggers!
In summary the tying steps are:
Step 1
A bead is added (optional), the body dressed with tying thread, a long, very sparse tail is tied in and the thorax is weighted with six wraps of lead (optional).
Step 2
The body components are tied in immediately behind the thorax and secured against the side of the hook with tying thread wrapped back to the tail. Hold them out towards your chest under a little tension when you do this so you wrap them onto the side of the hook.
Step 3
The body components are lightly twisted together and wrapped to a point just behind the thorax on the shank where a small cock hackle is tied in by the tip and an extra peacock herl is added.
Step 4
The body material and the hackle are twisted together and wrapped up to the bead, or just behind the eye where they are tied off.
Step 5
Splay out the tails fibres by pressing your thumb nail against them at the point where they leave the hook. This gives the tail a far more natural look and invites more movement into the fly.
*
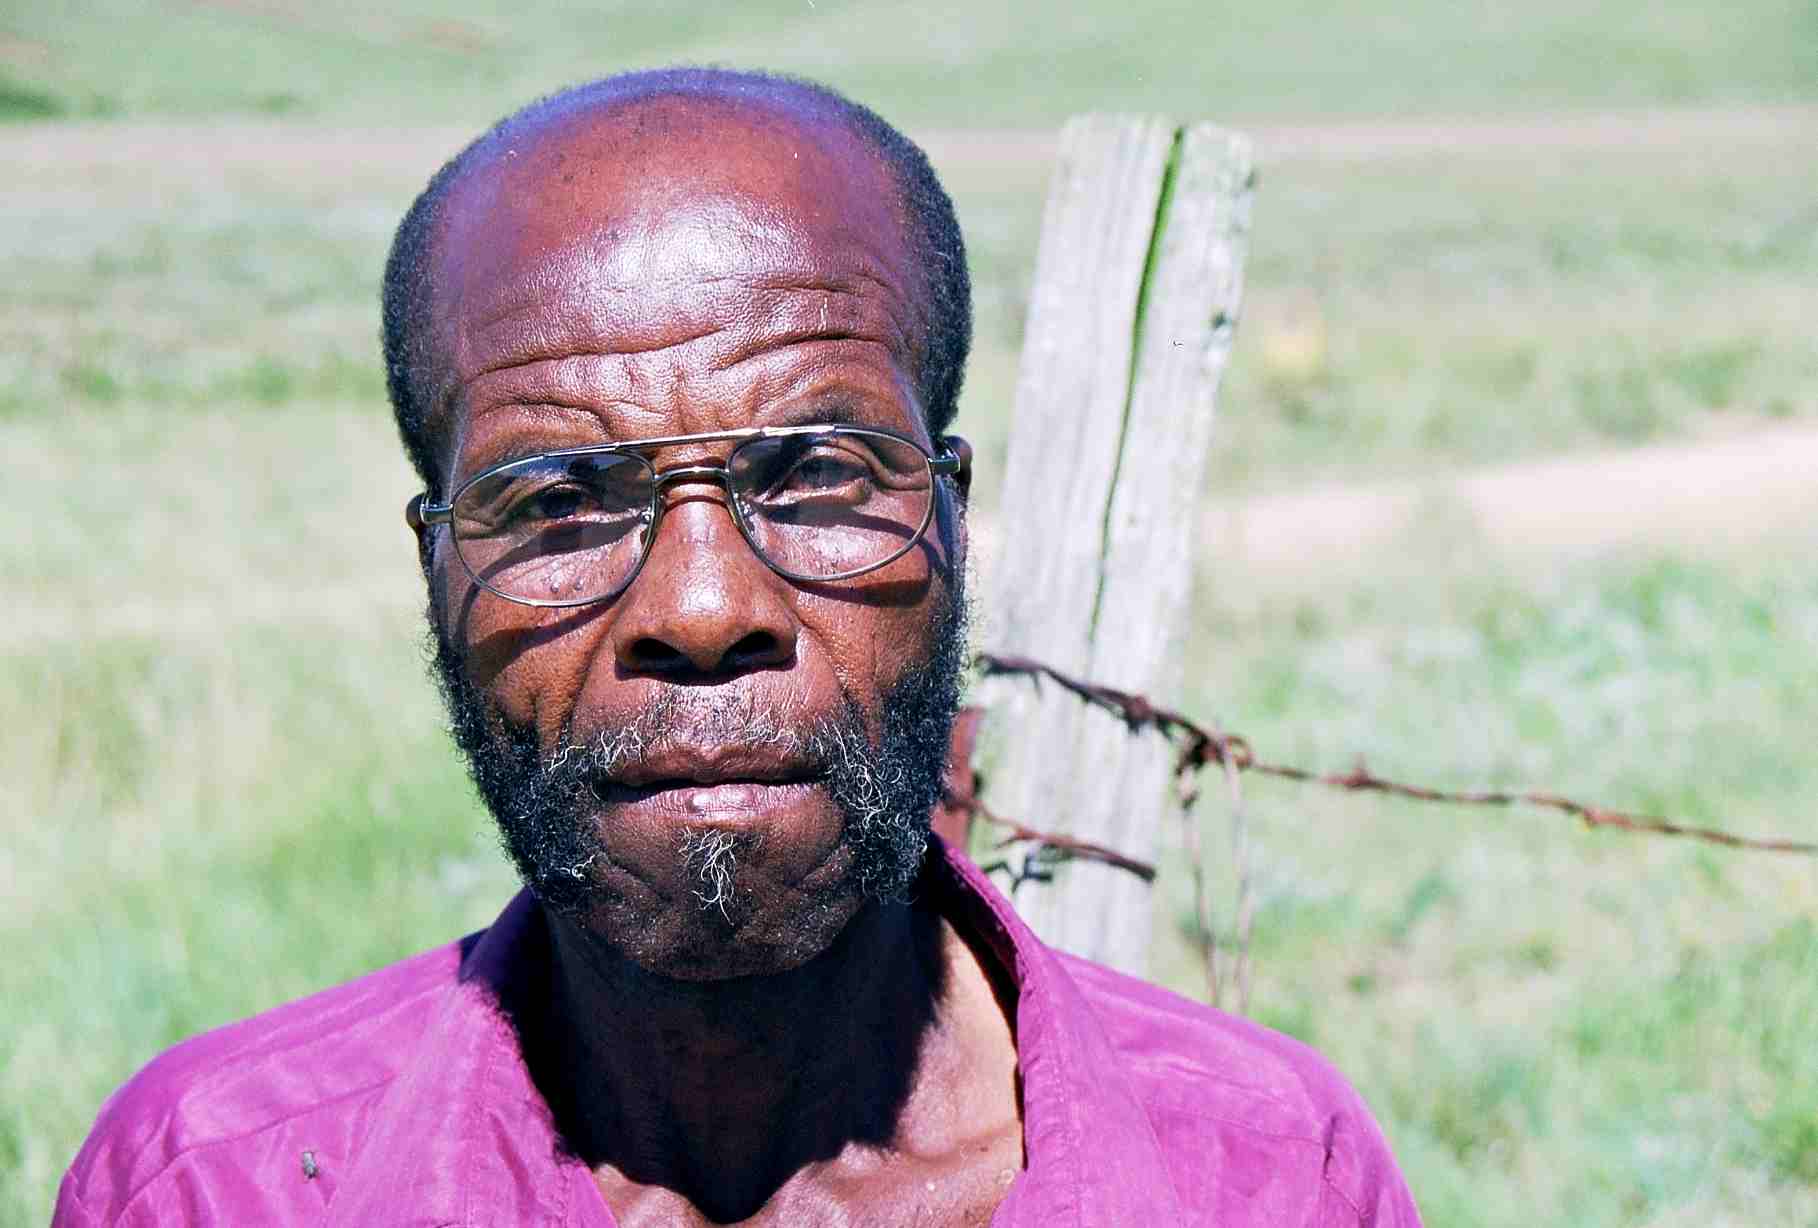
Zak, after whom the fly is named, at his home in KZN
Fishing the Zak
Zaks fish well on a floating line with a strike indicator, just like you would use most other nymph patterns, getting takes on the drop (especially in lakes or slow moving rivers), or when dead drifting deep through fast runs, or tumbling in riffle water, and then, often, on the swing-out, when you can add a little movement to the fly, or retrieve it. On small rivers I use 16’s and 14’s and on large rivers with deep pools, size 12's and I may go up to a size 10's. On lakes I stick with size 12 patterns.
I weight the flies in distinct categories (no weight, in other words emergers, medium and heavily weighted), with a thread colour code I can quickly identify. This way I can get the fly to drift near or on the top, or to sink slowly, or like a brick, depending on conditions. The distance I tie the indicator from the fly is roughly twice the depth of the water I’m fishing and for really heavily weighted Zaks, I often use two, or even three indicators, at various distances from the fly.
Variations on the theme
Blue glass bead Zak

Glass beads reflect a lot of light and are virtually weightless. As such the pattern above should maybe not have had any wire in it and an under-thorax made of wraps of a single strand of wool. But wire is almost weightless and it does add strength to the body. The downside to glass beads is that they crack and break off in no time in rocky streams. Of all the colours red seems to be the best for glass beads on Zaks. Note on the pattern above the tails are almost perfect - long, wispy and full of trigger movement!
The Zak Emerger

The Emerger variation is exactly the same tie as the standard Zak, but I prefer a curved hook and I use Cul de Canard legs as in the pattern above. Another useful tip is to add a few turns of flat, closed-cell foam when you build up the thorax. This will help to keep the fly in or near the surface film. Note, for obvious reasons (the hook shape in this case) no thread colour weight coding is needed.
The Hot-bead Zak
I must thank Darryl Lampert for this development. He did a lot to show us all the value of 'hot' beads at times, and his CdC Nymph is a killer with its orange tungsten bead. Again, obviously with a hot-orange bead in place no thread code is needed. If you're fishing this pattern to really large fish it pays to tie it on a heavy wire hook.

Happy tying. If you get stuck, send me an email with your problem and I will do what I can to help you.
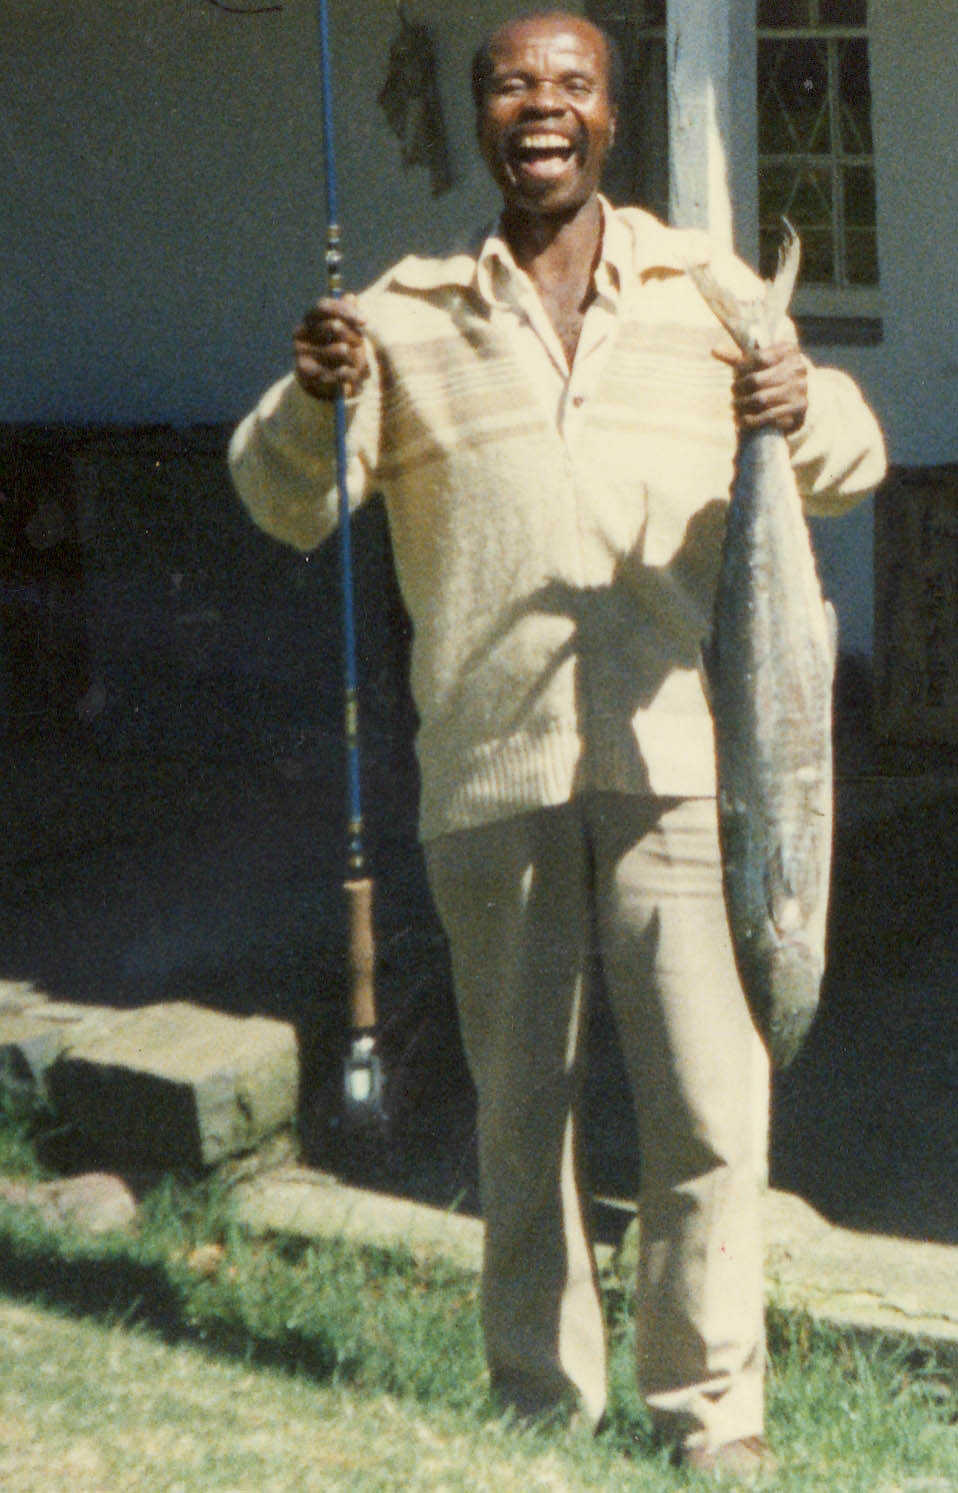
Zak up at the Old Dam having a bit of fun with us. Circa 1990.
Tom Sutcliffe
All images, art and text are copyright protected © 2010
No content may be reproduced without written consent by the Author and Owner.
***

