Back in about April, in one of his regular weekly newsletters, Tom Sutcliffe wrote about the gills along the side of a natural nymph and postulated that this feature could potentially be a big trigger for trout. And then in that same mail, he set a challenge to fly tiers to come up with a way of imitating the lateral gills or breathing filaments, pointing out that if you watch the natural the gill filaments are always moving.
At the time I had just written about a method for tying gill bodied nymphs.
http://truttablog.com/2013/03/29/gill-bodied-nymph-revisited/
In fact it was my second piece on the subject and an improvement on a somewhat duller pattern I had worked on late last year.
http://truttablog.com/2012/12/08/a-gill-bodied-nymph/
The above pattern basically uses Ostrich herl, wrapped through spaced turns of ‘V-Rib’, and trimmed top and bottom.
Click in images to enlarge
Someone since showed me that this had been done before by the guys at flytyingclips.com:
Never one to let these things go, I kept my eyes open for something better.
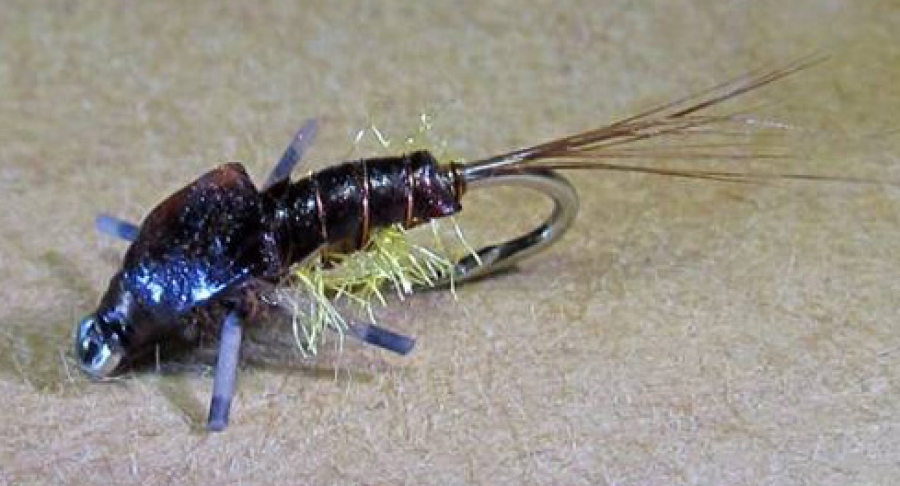
I think I may have found it. Much as I would like to take credit for this improved method, I cannot: I found it on the internet, at least in a very similar form. This fly is a “gilled Chiloporter” tied by Marcelo Morales:
http://www.flydreamers.com/en/fly-tying/view-250/gilled-chiloporter
The link above will take you to a ‘step-by-step’.
The concept is quite novel and unique, and I couldn’t help but ask myself why I hadn’t thought of it!
And just to show what I am on about, here is a series of photographs taken by Tom Sutcliffe of mayfly nymphs under water and note just how prominent their gills are!!
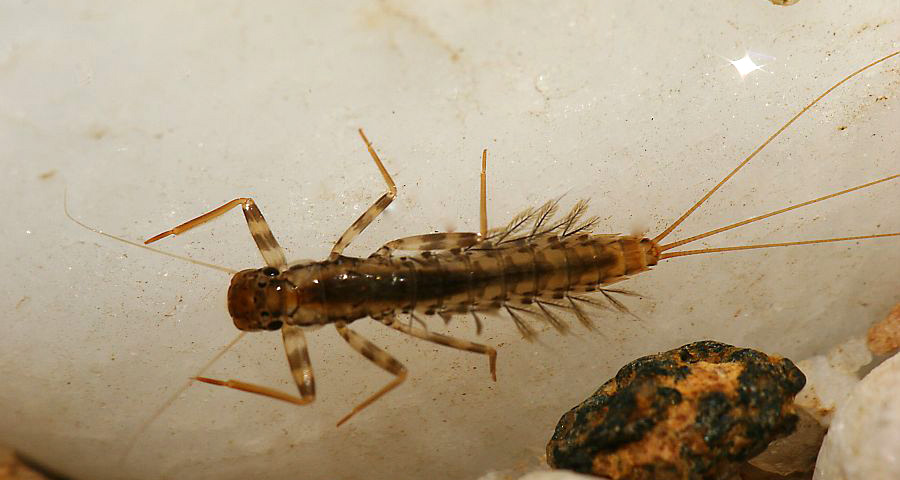

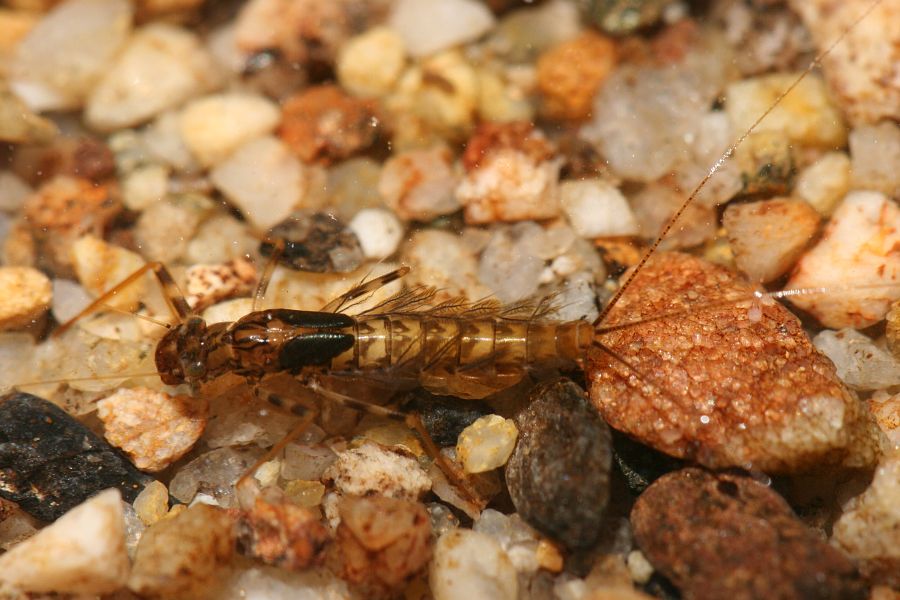
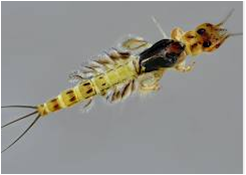
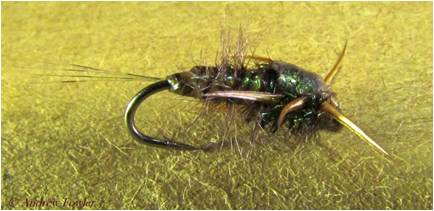
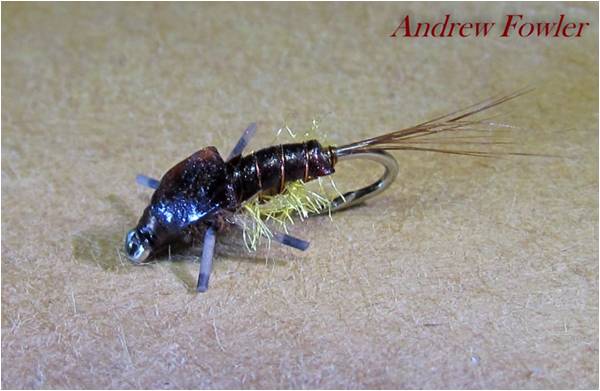
Image per Andrew Fowler
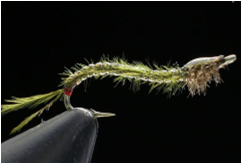
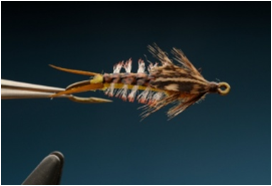
My own ‘step-by-step’ below, gives an idea of how it is done in some detail, and on a much smaller nymph, for our South African streams:
A standard tail (Coq de Leon)
Tie in the body material (floss), and a rib of copper wire.
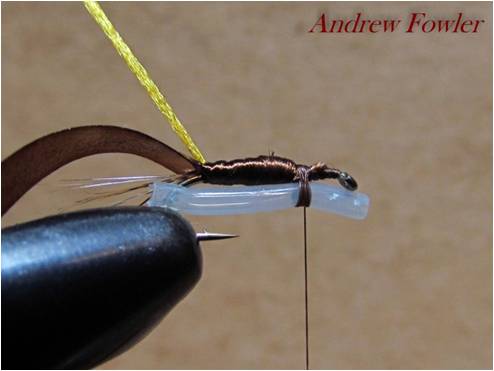
Then I use a strand of “nymph skin” or scudback, which is tied onto the top of the shank:
Then I select some antron yarn
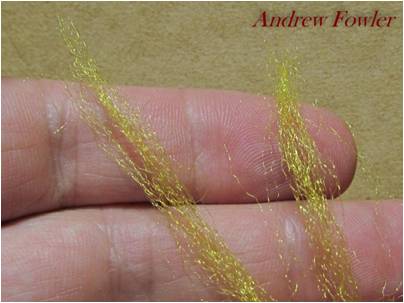
Split the yarn into a thinner strand depending on the hook size you have used.
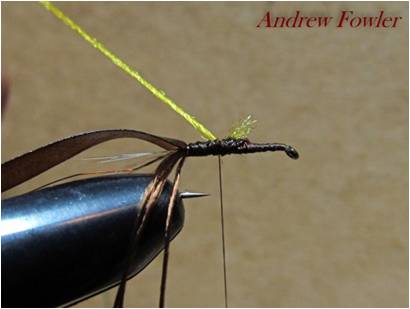
Tie in the yarn. (Floss also works well as a gill material.) Wrap the body with the floss
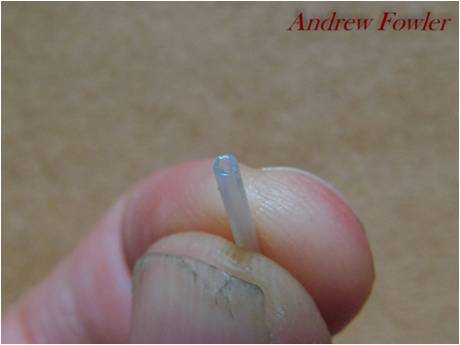
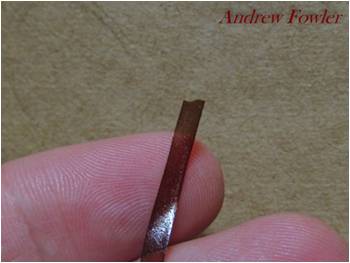
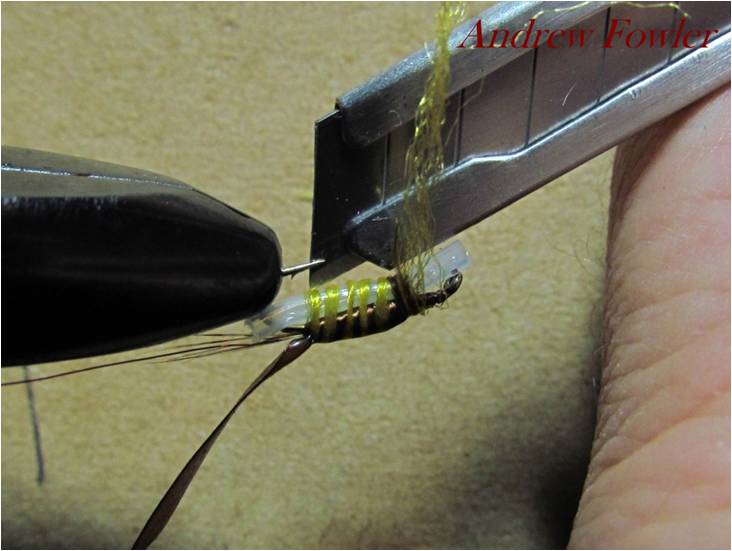
Now find a small piece of plastic tube. The size depends on the hook size. Here I used some “scooby wire”. You need to snip the end with scissors, or alternatively cut a slot with a blade.
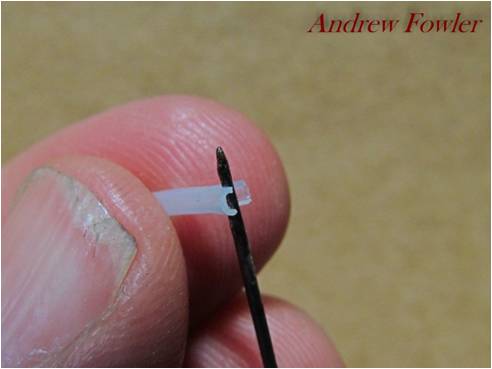
Either way, you want to create a slot that will allow you to place it over the hook bend, as demonstrated with a needle above.
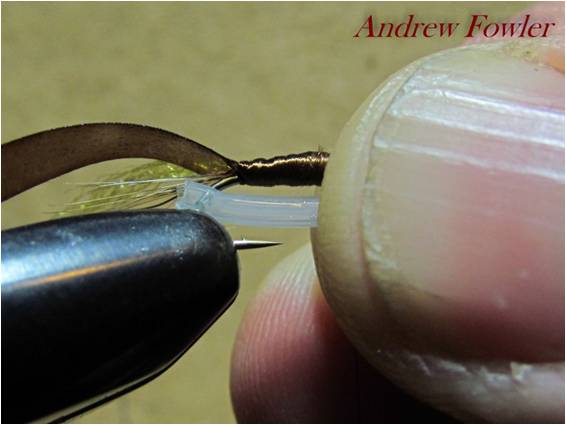
Now place the tube along the base of the shank, pushing the slot over the inside of the bend as shown above.
Tie the tube in at the front with your silk.
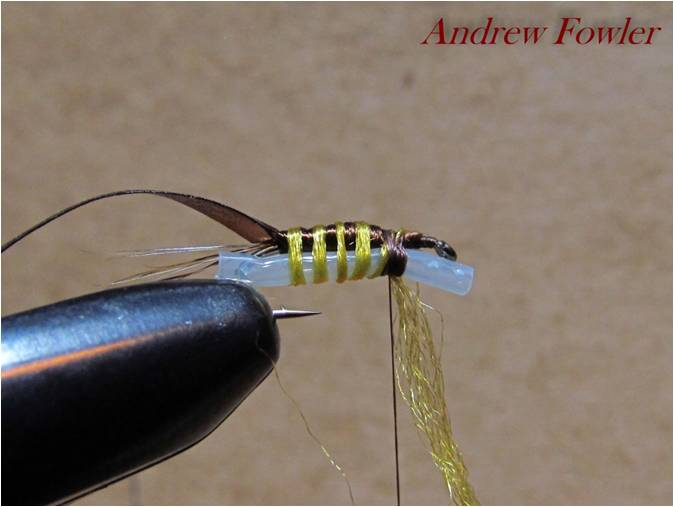
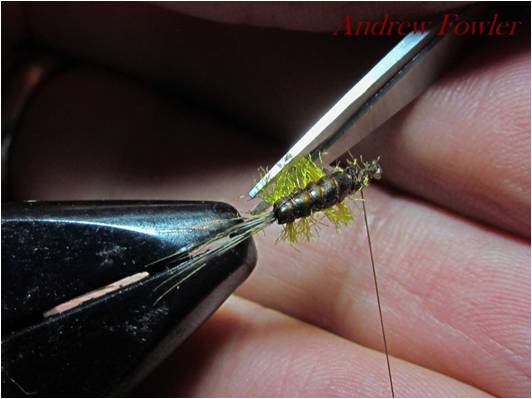
Wrap the yarn in even, separate turns, right over the tube and the fly body, and tie it off at the front. You may been to twist the yarn, to keep it in a tight thread. This is important for when you come to rib the body later.
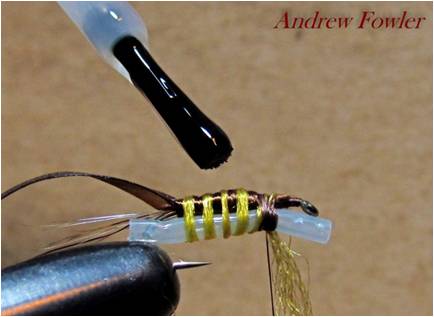
Apply some UV glue in a thin line along the spine (the top side), being sure to brush the glue right up over the silk tie off at the front.
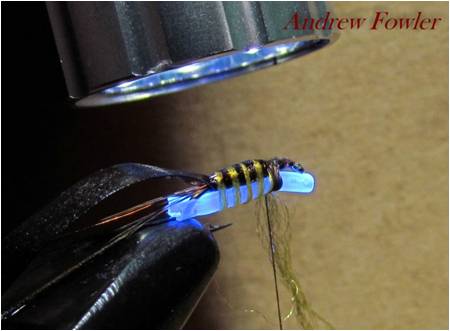
And cure the UV glue. Then cut the silk (no need to whip finish, the thread will be glued in place)
Now, rotate the vice, to expose the belly of the fly, and using a very sharp craft knife, cut the antron yarn, all the way from the hook bend, along the tube, and to the front, cutting the wraps of thread too.

As you cut the last wraps, the tube will be exposed as shown above, and will come free.
After removing the plastic tube, cut away the frayed wraps of thread.
Now re-start your thread at the front, pull the scud back forward (Stretch the scudback to make it sufficeiently narrow), and tie it in.
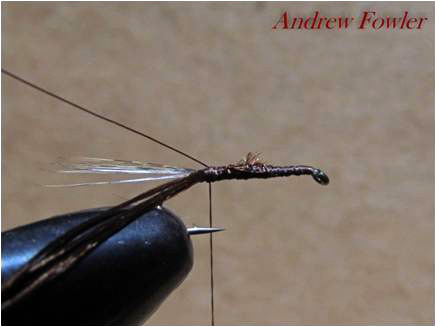
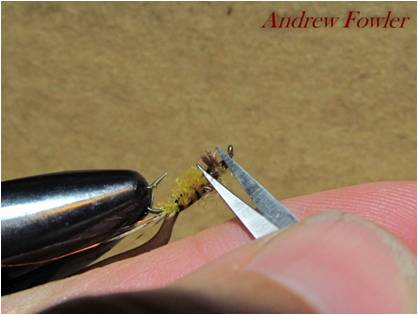
Now comes the copper wire rib. Bring it forward in even turns, being sure to wriggle it through the gills, so as to avoid trapping fibres.
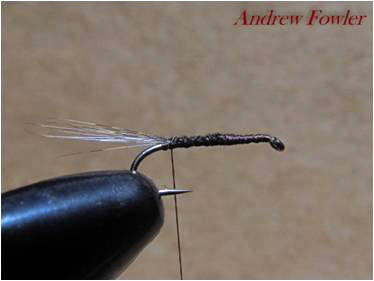
After tying off the rib, you can snip the gills to the desired length.
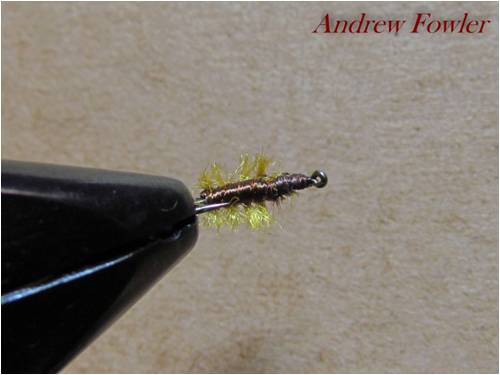
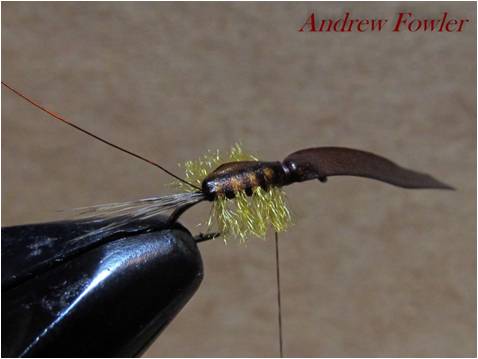
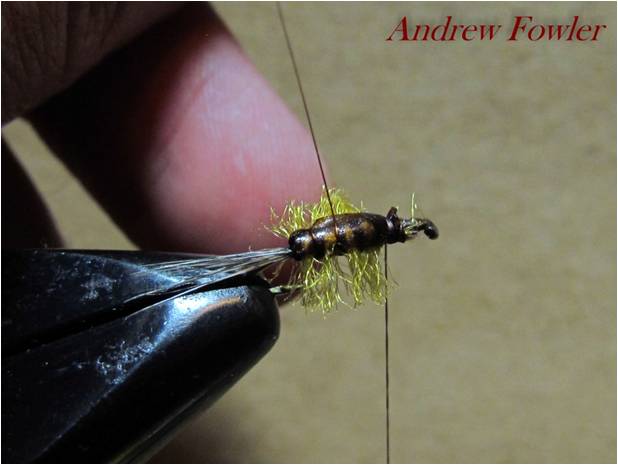
Fron the underside you will have a ribbed , shiny floss body. On the topside you will have a smooth, ribbed body. And along the sides, you will have sets of breathing gills.
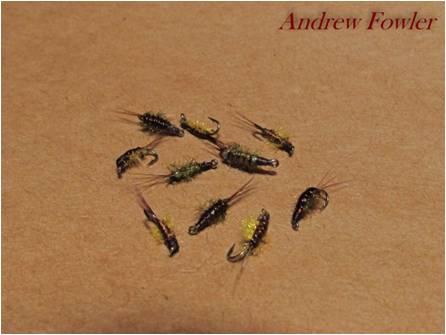
I would recommend that you tie up the bodies in batches.
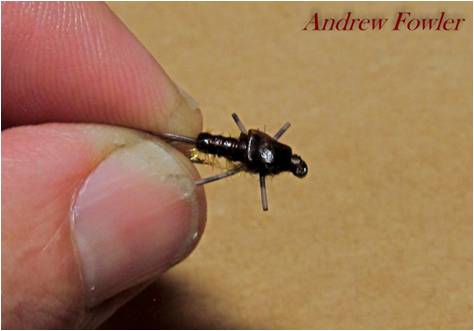
Then later you can add the legs and thorax, using wahtever colours and techniques you desire.
At this stage this is just a fly-tying project. One could argue that it is a fiddly exercise, and of more value to the fly tier than the fly-fisherman, and you may well be right, but they are a lot of fun to make. As for how well they will fish: the rivers here in KZN are in need of some decent runoff. As soon as that has happened, I will be giving these a try.
Andrew Fowler